

Hi there!
If Valentine’s Day is approaching and you’ve got an infant, the stars have aligned & it’s time for an adorable photoshoot! Valentine’s Day is a great time to take these photos, but they’re adorable at any time of the year.
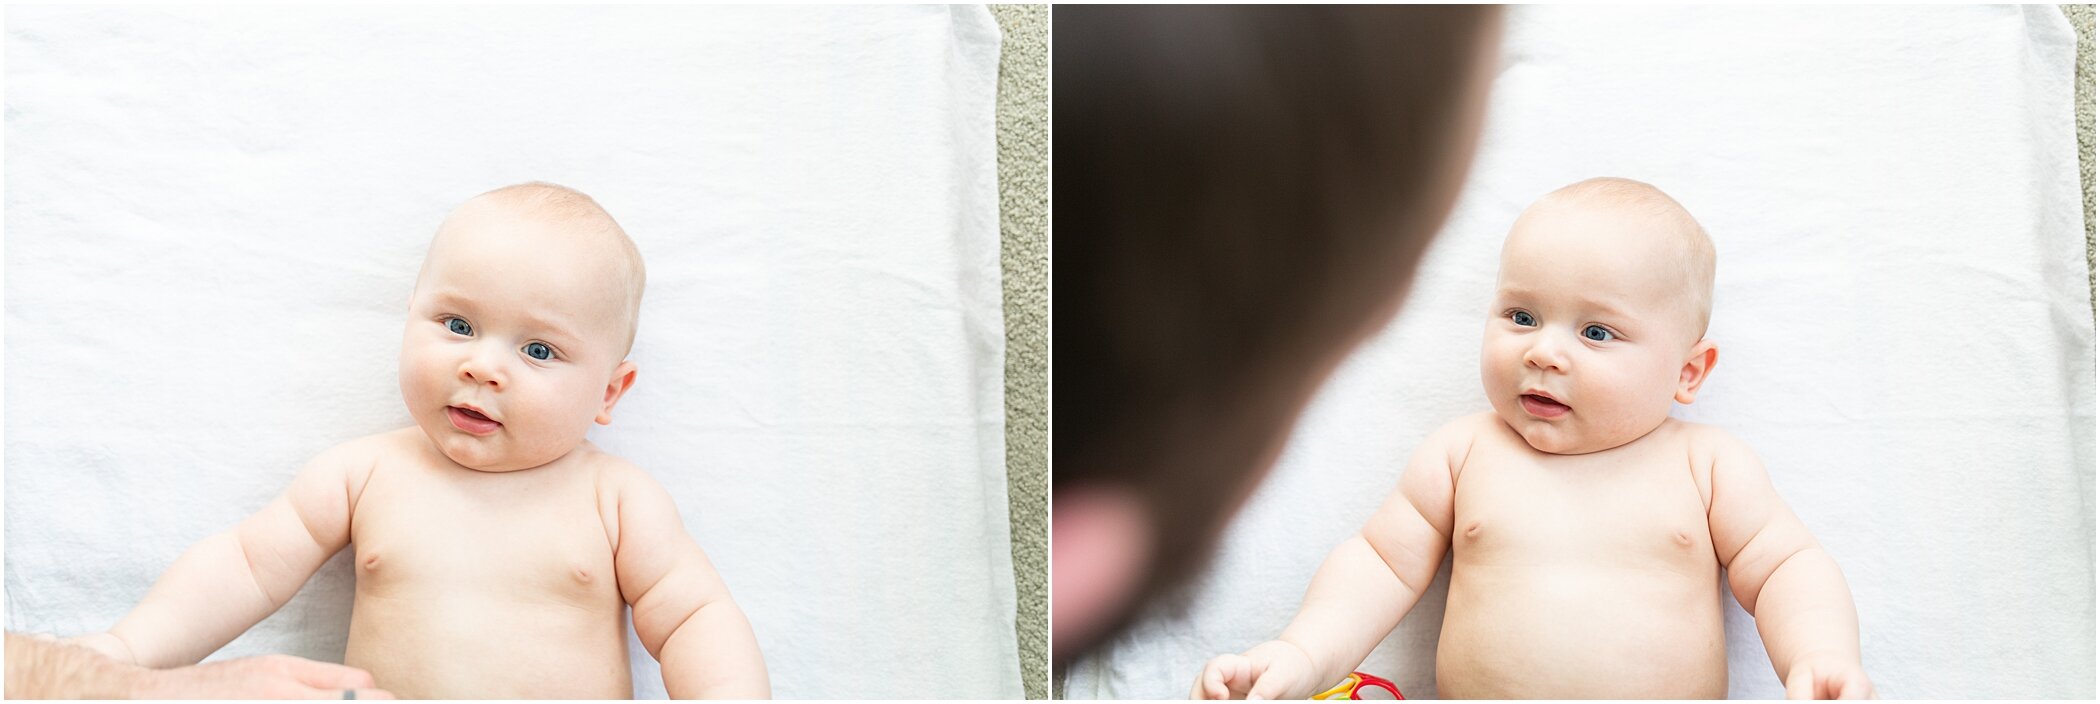
Our son’s half-birthday happens to fall on Valentine’s Day, so he was exactly 6 months old when we took these photos! It was the perfect way to celebrate him, give some extra smooches, and have photos that will always make my heart happy.
Follow these easy steps (and read them ahead of time!) to have your own stress-free & relatively mess-free baby kiss photoshoot.
How to Take Adorable Kissy Baby Photos in 8 Easy Steps
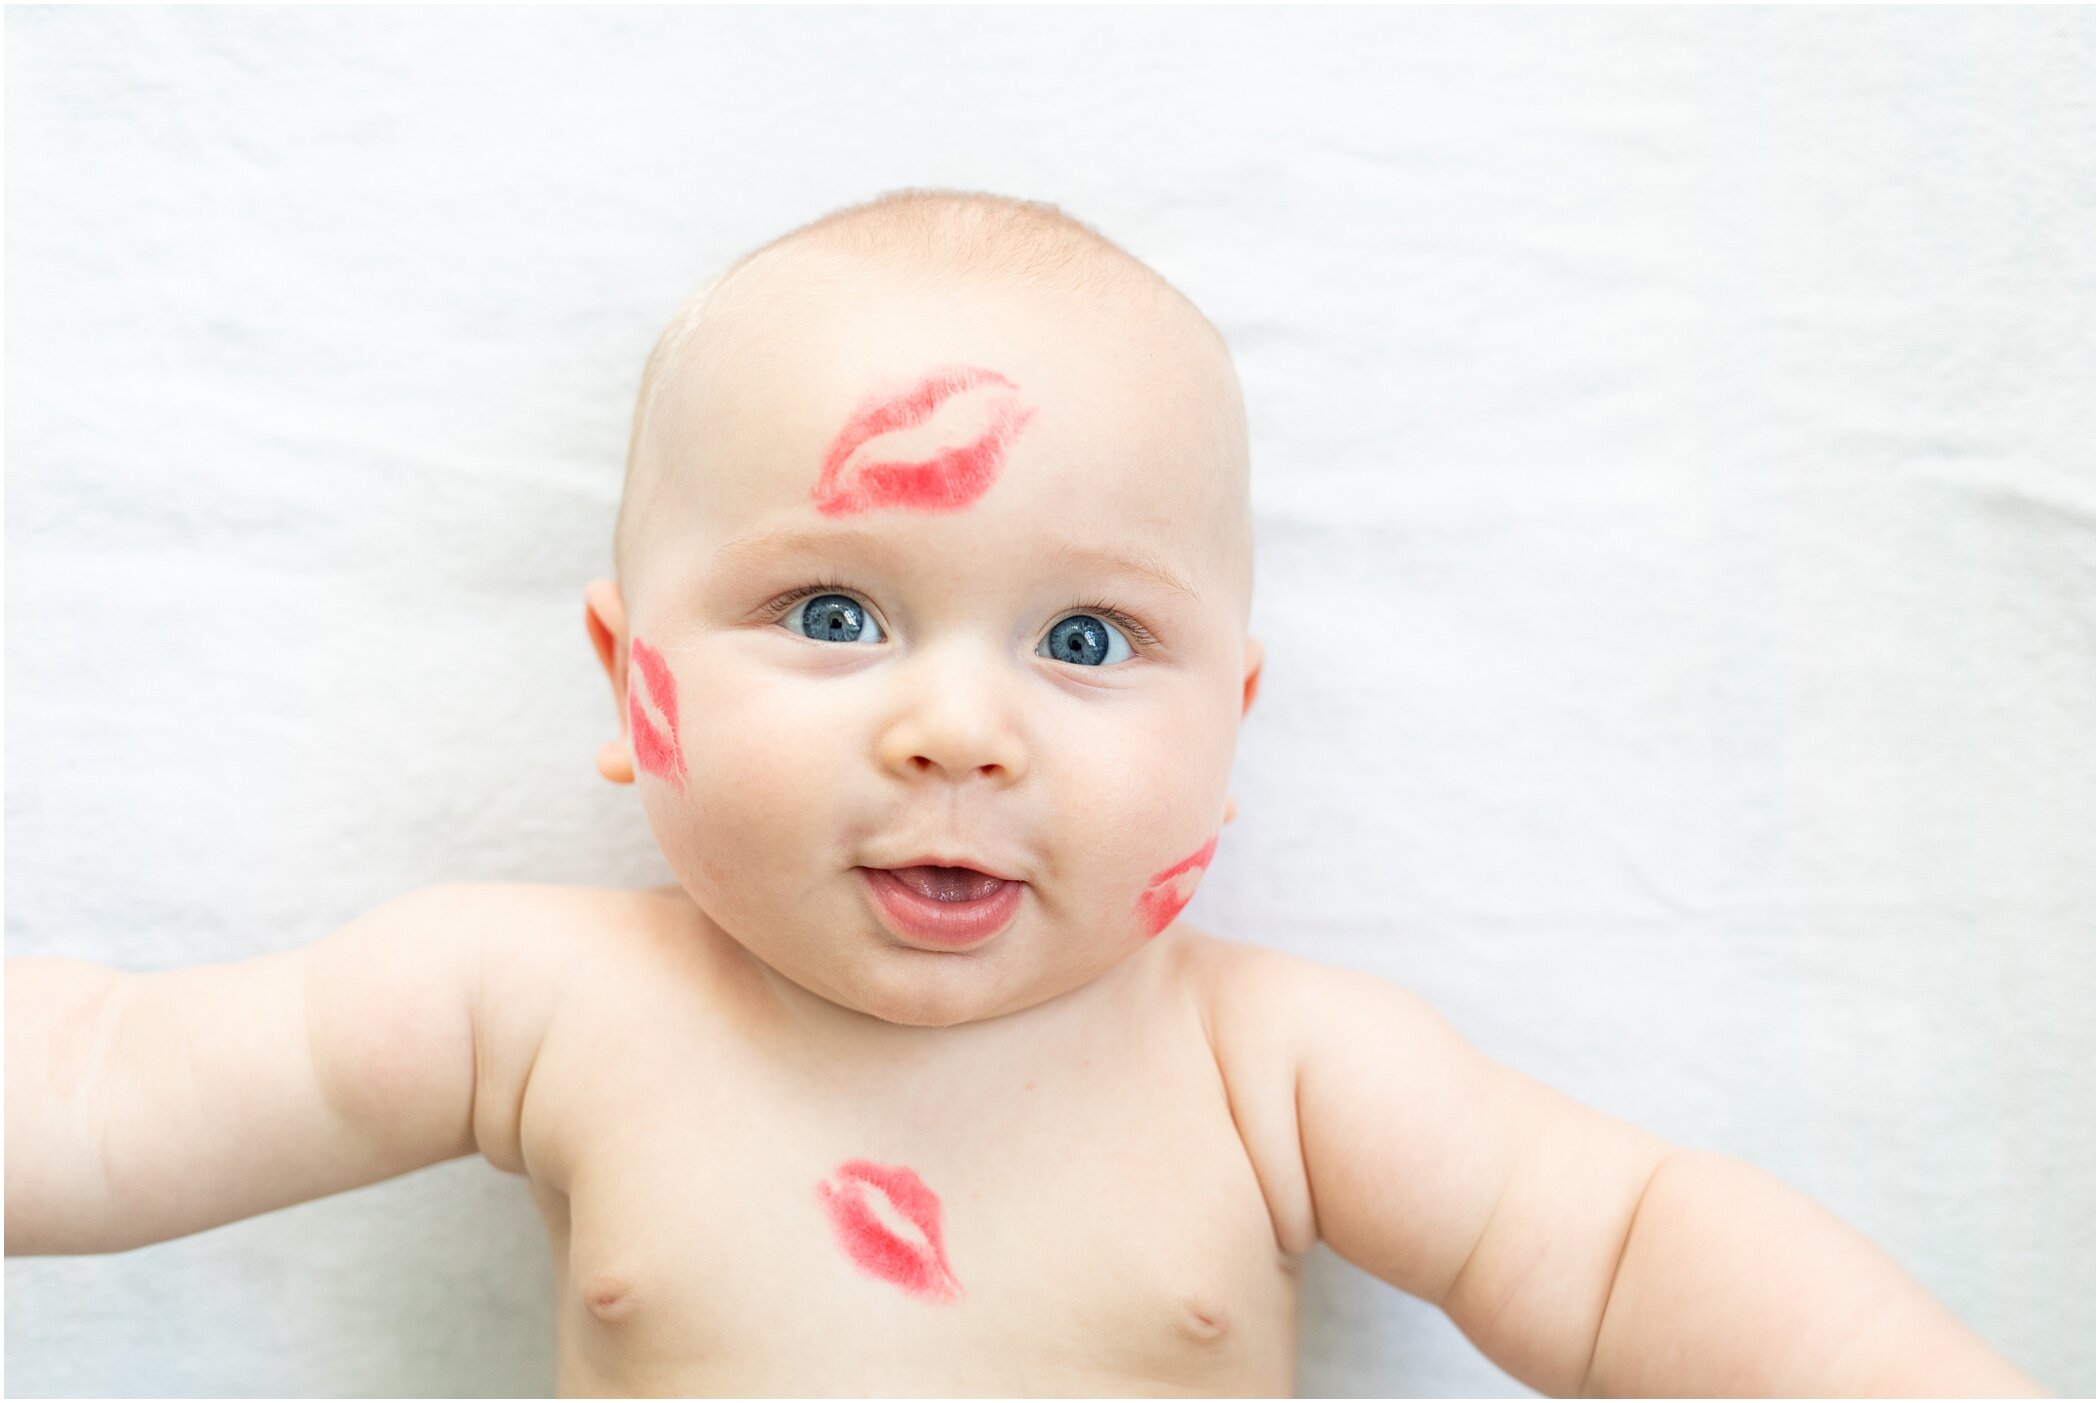
Lipstick Kiss Baby Photos

WHAT YOU’LL NEED:
-
A baby! – This photoshoot is great for babies who aren’t rolling a bunch or crawling yet; otherwise, they may try to escape But, no harm in trying with more mobile babies anyway if you’re up for it.
-
A white sheet or blanket – ideally one that is okay to get messy or stained, just in case! We used the back of a fleece baby blanket we had a duplicate of, but amazingly enough, this wasn’t messy for us!
-
A helper – It’s super helpful to have another person with you, who can get the baby’s attention and help with anything you need!
-
A toy – It’s great for the baby to have something to look at, at least while you’re getting ready before actually taking the photos (while you’re taking them, baby may be focused on the camera/phone anyway!). It’s also helpful if the helper holds the toy instead of the baby so that it’s not in the photos, blocking baby’s face, or smudging the lipstick.
-
Red lipstick – obviously Pink lipstick could also work, but red will stand out better from most skin tones. I bought lipstick for a couple bucks at the Dollar General near my house, because I didn’t have any. If you already have some, use what you have!
-
A sheet of paper – Use this if you’d like to test out your lipstick prints first, before kissing the baby!
-
A wet cloth for cleanup
HOW TO DO IT:
STEP 1 – First, plan to have this little photoshoot when baby is the happiest – when they are well rested and fed. If possible, it’s also great to plan it for when there is lots of natural light in your house (sunlight coming in from the windows). Try not to rely on a ceiling light above you, since your body will block the light when you stand over the baby to take the photos, causing baby to be in your shadow!
STEP 2 – This one’s easy! Lay the blanket flat on the floor, and place baby on his or her back in the middle of the blanket. Have your helper hold the toy to start getting baby’s attention! (You can see my husband and our O-ball at the very bottom of the second photo.)
STEP 3 – Put the lipstick on your lips (don’t be shy – put plenty on) and test out your lipstick print on the paper if you’d like. Your helper can be the kisser instead, if you prefer! Keep in mind that kissing the baby won’t be quite the same as kissing the paper, since a baby’s head & cheeks are curved and the paper is not. But – I’d recommend doing this practice anyway, since I don’t love the kiss print on Isaac’s forehead here (the one I did first), but I love the one on his chest (which I kissed on third). Your kisses get better with practice!
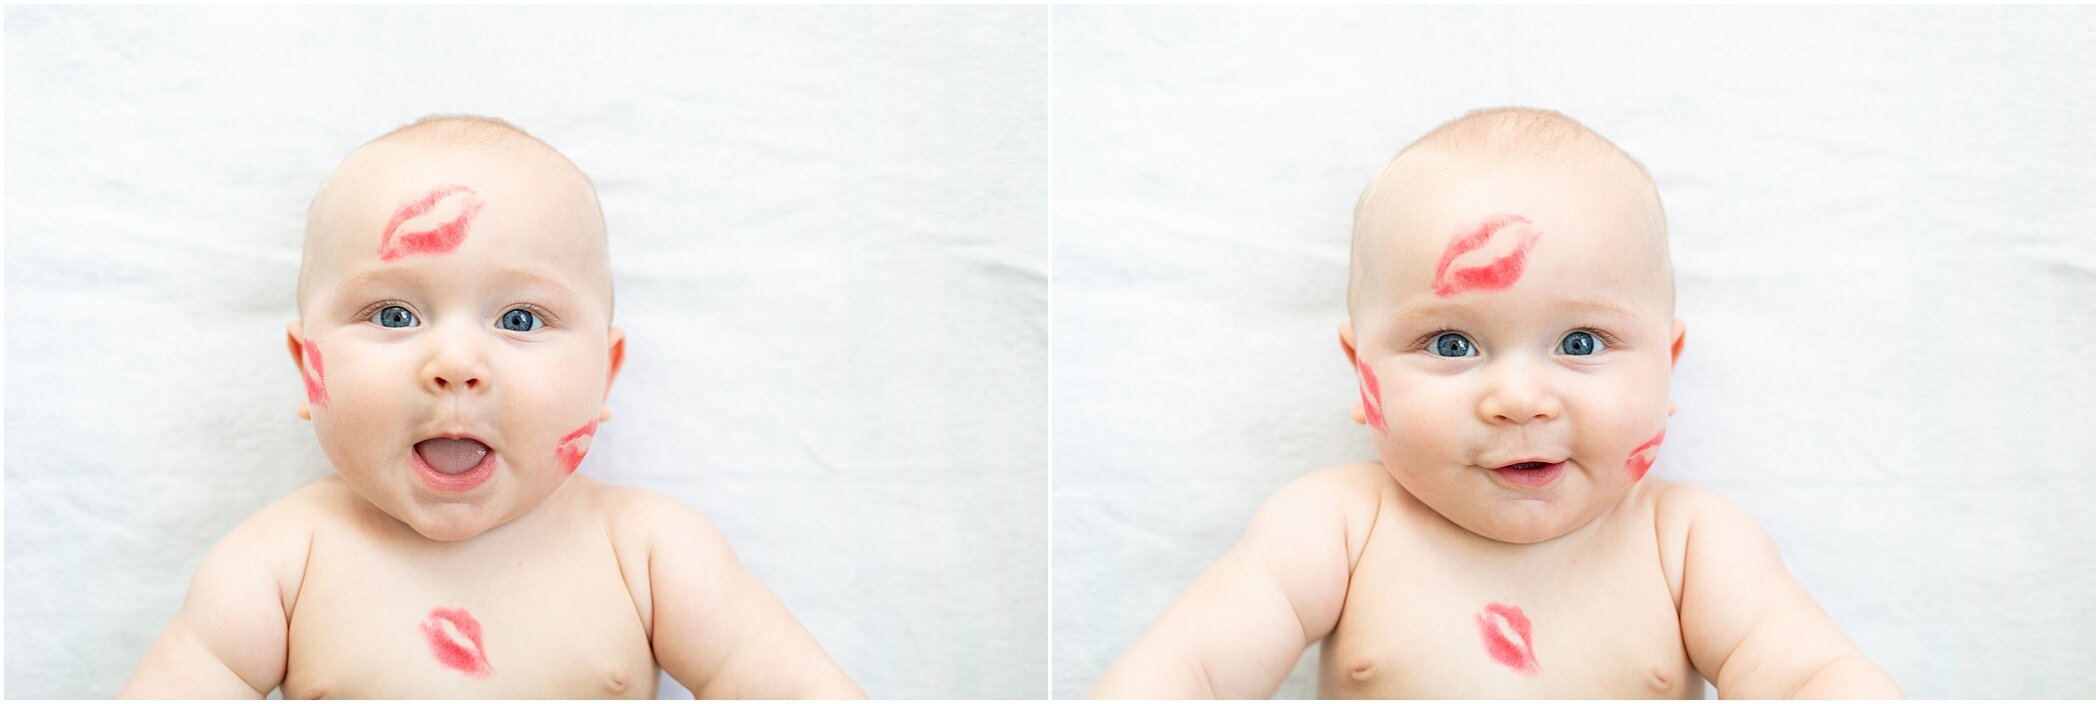
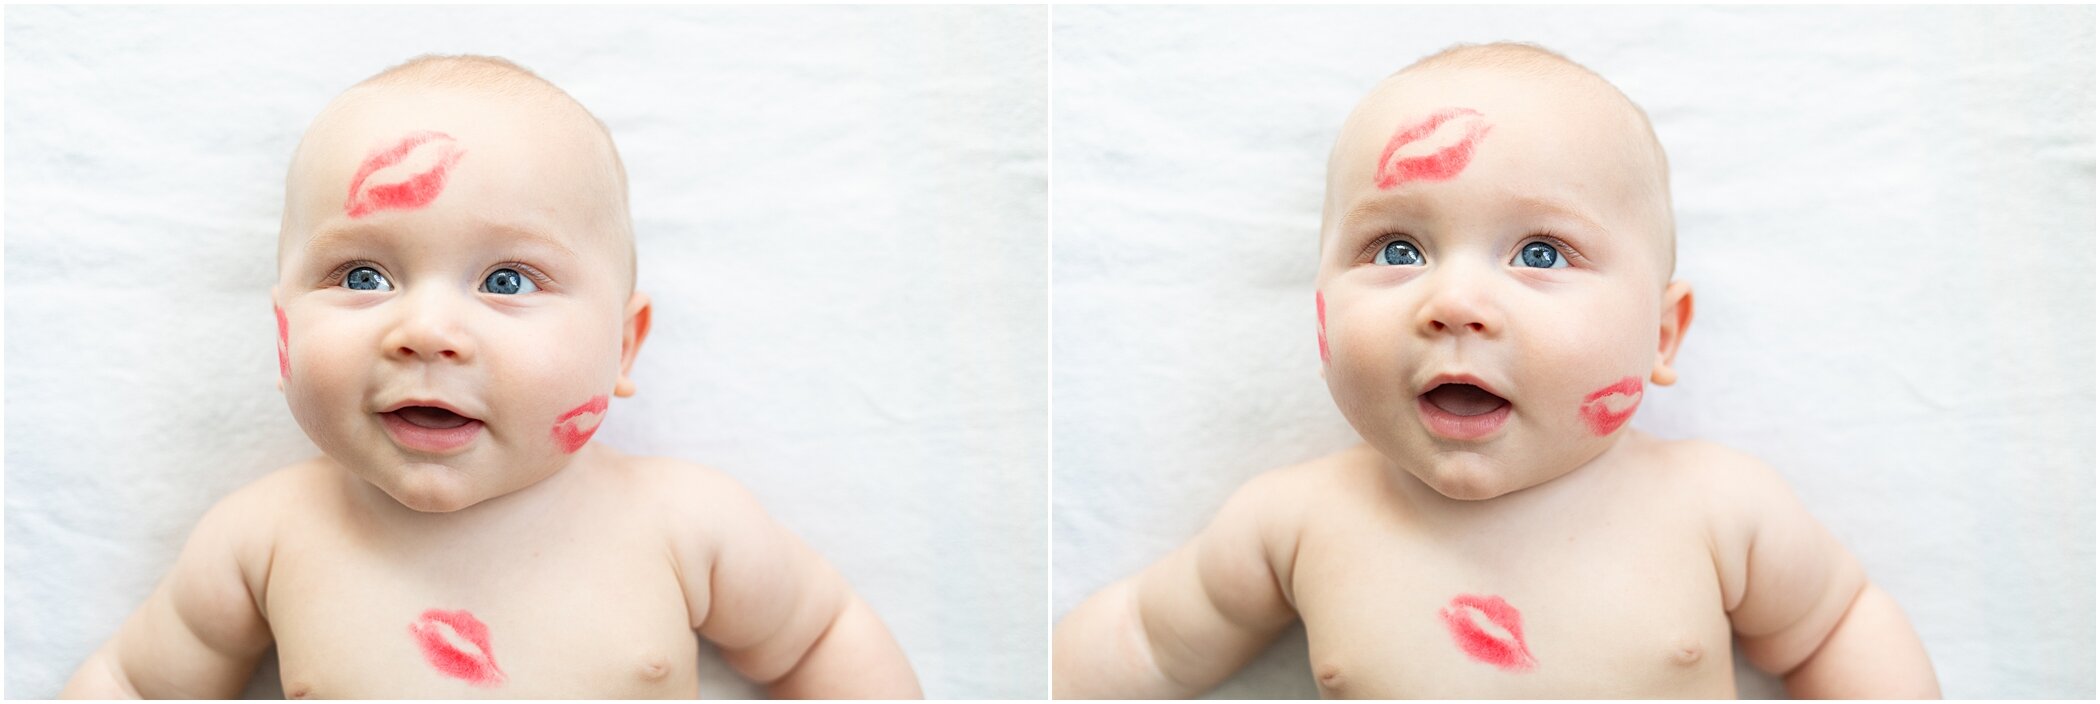
STEP 4 – Apply more lipstick, and kiss the baby! Repeat for each kiss – apply more lipstick, kiss a new spot, apply more lipstick, kiss a new spot. I recommend kissing in different places on the cheeks so that one cheek has a kiss that is higher and one cheek has a kiss that is lower. Symmetry is cute too, but I like the random look for the kisses! You’ll see our second cheek kiss in a moment.
STEP 5 – Stand over the baby so that your camera is pointing straight down, and take some photos! Review the first few photos to see what you think.
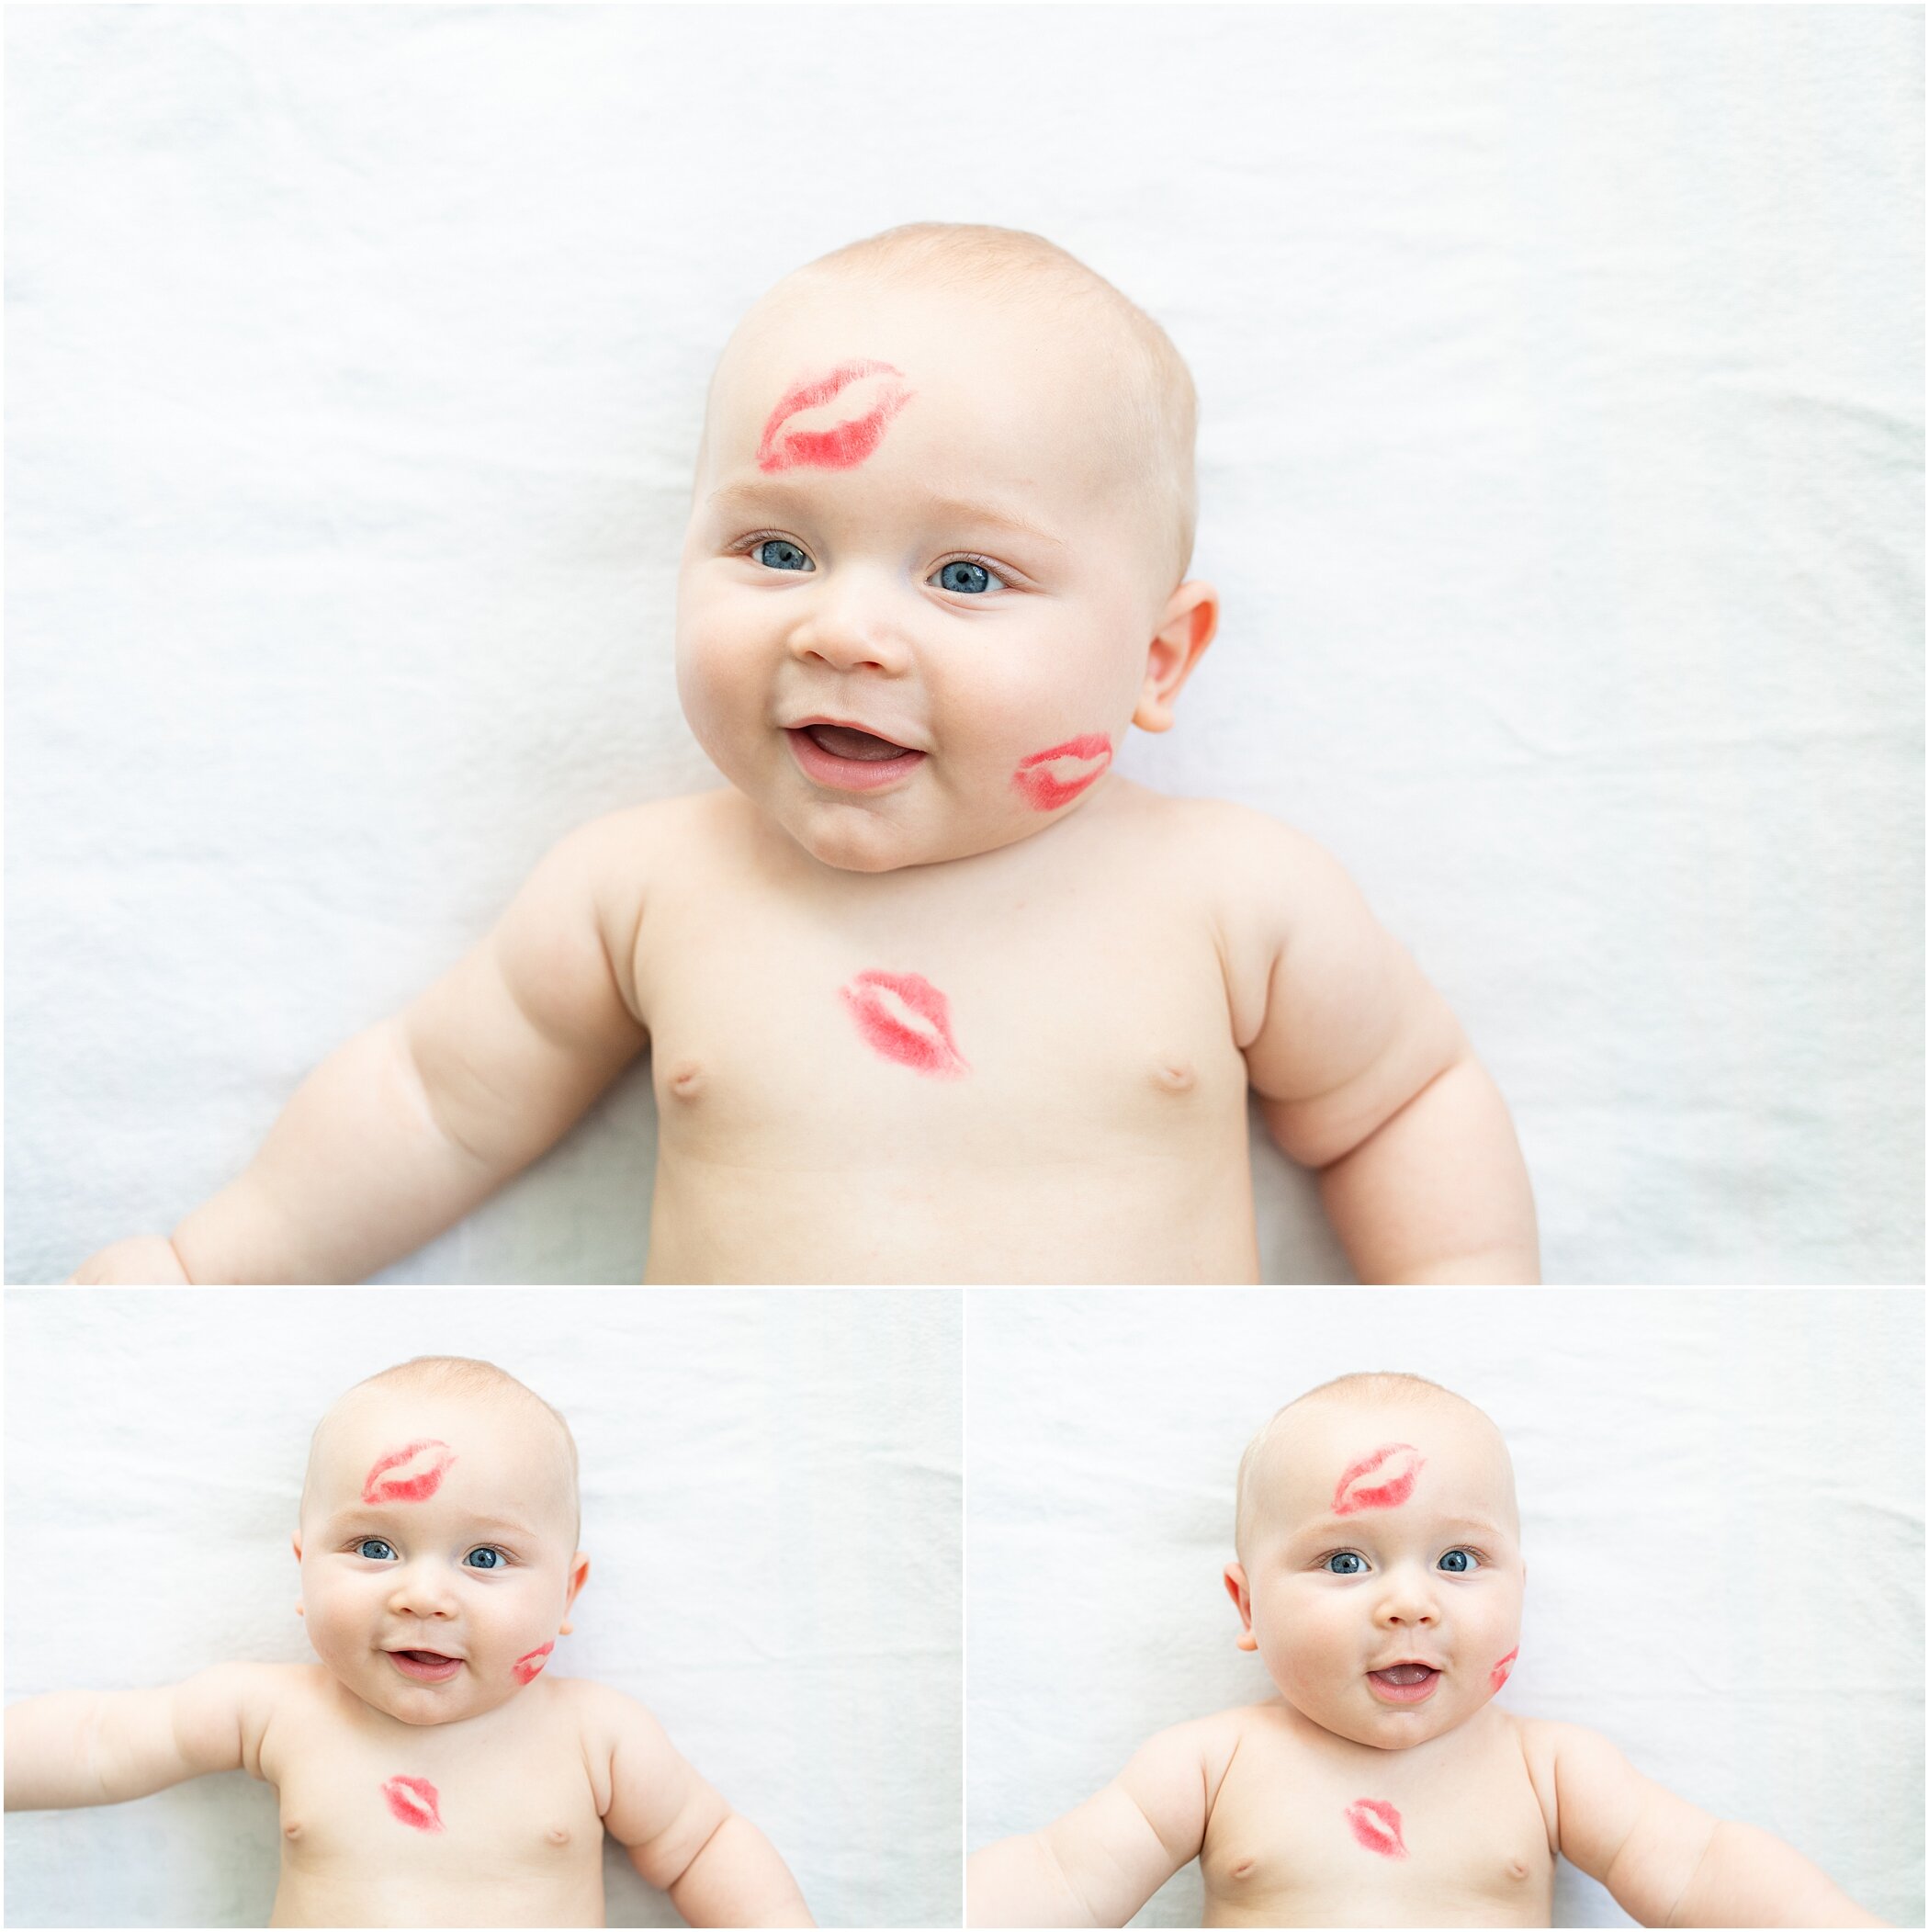
STEP 6 – Add more kisses if you’ve got some empty space dying to be smooched. We added one to Isaac’s right cheek to “fill out” the look!
We ended up with 4 kiss prints total, and I was tempted to do more but didn’t want it to be TOO much
STEP 7 – Take lots of photos, because you never know how the baby will move and which ones you’ll like the best! We ended up with a lot of favorites
STEP 8 – And then it’s clean up time! Use the wet cloth or whatever you’ve got to clean those cute little kisses off. You should do this right after the photoshoot, so the prints don’t dry on too much. It was surprisingly easy to wipe them off when we were done, so I hope it’ll be the same with the lipstick you use.
You’ve done it! And now you’ll have adorable kissy baby photos (maybe from baby’s first Valentine’s Day!) that you’ll always treasure.
Let me know if you have any questions, and have fun! Give your baby lots of snuggles for me!
Live in the Raleigh area & want to leave it to a pro? I’m happy to help with these and more photos of your whole family!
